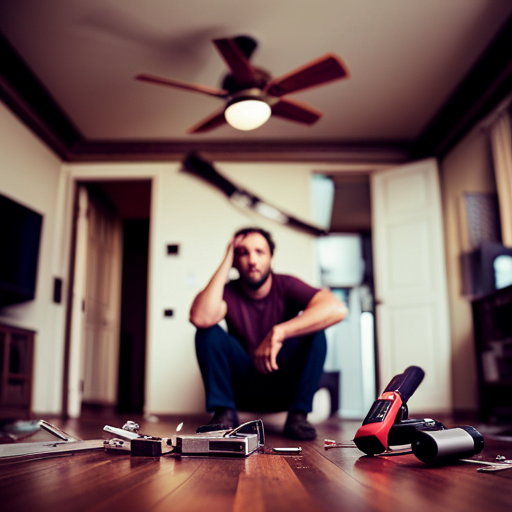
Have you ever had the unexpected happen? One moment you’re enjoying the gentle breeze of your ceiling fan, and the next, it comes crashing down, causing chaos and confusion.
It’s a situation that can leave you feeling overwhelmed and unsure of what to do next. But fear not, because in this article, we will guide you through the steps to take when your ceiling fan falls off.
From assessing the damage to ensuring your safety, we’ve got you covered. We’ll show you how to turn off the power, gather the necessary tools, and safely remove the fallen fan.
And don’t worry, we’ll also walk you through repairing or replacing the bracket and installing a new fan.
So, take a deep breath and let’s tackle this unexpected issue together.
Assessing the Damage
Now that your ceiling fan has come crashing down, it’s time to assess the damage and figure out how to fix it.
Start by evaluating the structural integrity of the ceiling and surrounding area. Look for any cracks, holes, or other signs of damage that may have been caused by the falling fan. It’s important to ensure that the ceiling can support the weight of a new fan before installing a replacement.
Next, examine the fan itself to determine if any parts can be salvaged or if it needs to be completely replaced. Take note of any broken blades, bent brackets, or loose screws.
Once you have assessed the damage, it’s crucial to take steps to prevent future accidents. This may involve reinforcing the ceiling, using secure mounting brackets, or hiring a professional to install the new fan.
Don’t take any chances – prioritize safety and take the necessary precautions to avoid another unexpected incident.
Ensuring Your Safety
To ensure your safety, it is crucial to follow proper maintenance techniques. Here are four important steps to take:
Regularly inspect your ceiling fan for any signs of wear and tear, such as loose screws or wobbling blades. Address these issues promptly to prevent detachment.
Use appropriate mounting hardware and ensure that it is securely fastened. Double-check the manufacturer’s instructions for the recommended installation method.
Avoid overloading the fan with heavy attachments or excessive weight. This can strain the mounting and increase the risk of detachment.
Schedule routine maintenance, including cleaning and lubricating the fan’s components. This will help prolong its lifespan and prevent unexpected detachment.
By following these preventive measures and practicing proper maintenance techniques, you can significantly reduce the risk of accidents caused by falling ceiling fans.
Turning Off the Power
To keep yourself safe, make sure you turn off the power before performing any maintenance on your ceiling fan. Troubleshooting electrical issues can be daunting, but taking the necessary precautions is crucial.
Start by locating the circuit breaker or switch that controls the power to your fan. It is usually labeled and can be found in your main electrical panel. Flip the switch or turn off the breaker to cut off the electricity supply to the fan. This step is vital in preventing future accidents and ensuring your safety while working on the fan.
Always remember, electricity is dangerous, and even a small mistake can have severe consequences. So, take the time to turn off the power and avoid any unnecessary risks.
Gathering Necessary Tools
Make sure you’ve got all the tools you need to get the job done and enjoy a smooth maintenance experience with your fan. Here are the essential tools you’ll need:
- Screwdriver set: This will help you remove any screws that are holding the fan in place.
- Wire cutters: You may need to cut and disconnect any electrical wires.
- Voltage tester: It’s important to ensure that the power is completely off before working on the fan.
- Ladder: This will allow you to safely reach the fan and work on it at a comfortable height.
- Safety goggles: Protect your eyes from any debris that may fall during the process.
- Gloves: Keep your hands safe from any sharp edges or electrical components.
Proper maintenance is crucial to avoid unexpected accidents with your ceiling fan. Common causes of ceiling fan accidents include loose screws, worn-out motor bearings, and improper installation. By gathering the necessary tools and conducting regular maintenance, you can prevent these issues and enjoy a safe and functional ceiling fan.
Removing the Fallen Fan
After the fallen fan has been safely detached, it is important to carefully inspect the surrounding area for any potential damage caused by the incident. Did you know that according to a study by the National Fire Protection Association, ceiling fan-related accidents accounted for an average of 240,000 structural fires annually in the United States? To repair the damage, start by assessing any structural issues such as cracks or dents in the ceiling. If there are any, it is crucial to consult a professional to ensure the stability of the ceiling. Next, check for any damaged electrical wiring or outlets. Replace or repair them as necessary. Lastly, examine the fan mounting bracket and replace it if it has been damaged. To prevent future accidents, make sure to install the new fan securely, following the manufacturer’s instructions and using appropriate tools. Regularly inspect and maintain the fan to avoid any potential issues.
| Damage | Repair | Prevention |
|---|---|---|
| Ceiling | Assess for | Install new |
| Structural | cracks or | fan securely |
| Issues | dents | |
| Electrical | Replace or | Regularly |
| Wiring/ | repair | inspect and |
| Outlets | maintain | |
| Fan | Replace | |
| Mounting | bracket | |
| Bracket |
Inspecting the Mounting Bracket
Now that you’ve successfully removed the fallen fan, it’s time to inspect the mounting bracket to ensure it’s still in good condition.
This step is crucial in evaluating the stability of the ceiling fan and preventing future mishaps.
Start by thoroughly examining the bracket for any visible damage or signs of wear and tear.
Pay close attention to the screws and bolts that secure the bracket to the ceiling, as loose screws can compromise the stability of the fan.
Gently tug on the bracket to see if it feels secure and check for any wobbling or movement.
If you notice any loose screws, tighten them securely using a screwdriver.
Remember, a stable and secure mounting bracket is essential for the safe operation of your ceiling fan.
Repairing or Replacing the Bracket
To fix or replace the mounting bracket, you’ll want to assess its condition and ensure it’s sturdy enough for your ceiling fan. Start by inspecting the bracket for any visible damage or signs of wear. Look out for cracks, rust, or bent parts. If you notice any of these issues, it’s best to replace the bracket entirely.
If the bracket seems intact, but the issue lies with its stability, you can try repairing it. One common issue is loose screws or bolts. Tighten them securely, making sure they’re snug against the ceiling. If the bracket has tilted or shifted, you may need to adjust its position. Loosen the screws slightly and use a level to align it properly. Once aligned, tighten the screws again.
However, keep in mind that repairing techniques may not always solve the problem. If the bracket is severely damaged or if you’re unsure about its integrity, it’s recommended to replace it with a new and sturdy one.
Installing a New Fan
If you’re ready for an upgrade, it’s time to install a brand new fan that will transform your space and keep you cool all summer long. Here’s what you need to know to make sure you choose the right fan and troubleshoot common installation problems:
Choosing the right fan:
Consider the size of your room: A larger room may require a fan with a larger blade span for better air circulation.
Think about the style: Look for a fan that complements your decor and enhances the overall aesthetic of the room.
Troubleshooting common installation problems:
Check the wiring: Make sure all the wires are connected properly and that there are no loose connections.
Test the fan before mounting it: This will help you identify any potential issues before it’s too late.
Ensure the ceiling is sturdy enough to support the weight of the fan: If in doubt, consult a professional to avoid any accidents.
By following these tips, you’ll be able to install your new fan with ease and enjoy a cool and comfortable space in no time.
Testing and Adjusting the New Fan
Once you’ve successfully installed your new fan, it’s important to test and adjust it to ensure optimal performance and comfort.
Start by turning on the fan at its lowest speed to check for any unusual noises or vibrations. If you notice any issues, such as wobbling or excessive noise, try tightening the screws and ensuring that all parts are properly aligned.
If the problem persists, you may need to balance the fan blades by using a balancing kit or adding weights to the blades.
Additionally, it’s crucial to regularly maintain your fan to prevent unexpected issues. Clean the fan blades and housing regularly to remove dust and debris that can affect the fan’s performance.
Lubricate the motor and bearings annually to keep the fan running smoothly.
By troubleshooting issues and performing regular fan maintenance, you can ensure that your new fan operates efficiently and lasts for years to come.
Seeking Professional Help if Needed
Seeking professional help can be the smartest move when it comes to ensuring the optimal performance and longevity of your newly installed fan. Here are four reasons why it’s worth considering:
Expertise: Professionals have the necessary knowledge and experience to diagnose and fix any issues with your ceiling fan. They are familiar with the intricacies of different fan models and can provide the most effective solutions.
Safety: DIY repairs can be risky, especially when dealing with electrical components. Professionals know the potential hazards involved and take necessary precautions to ensure their safety and yours.
Time-saving: Hiring a professional saves you valuable time and effort. They can quickly identify the problem and provide efficient solutions, allowing you to enjoy your fan without delay.
Warranty protection: If your fan is still under warranty, attempting DIY repairs might void it. Professionals can fix the issue while keeping your warranty intact, saving you from potential expenses.
By seeking professional help, you can address any ceiling fan issues with confidence, knowing that experts are handling the job safely and effectively.
Frequently Asked Questions
How do I clean my ceiling fan after it has fallen off?
To clean your fallen ceiling fan, start by ensuring your safety with gloves and goggles. Gently wipe the blades and motor with a damp cloth, avoiding any electrical components. Finally, double-check all connections before reattaching the fan.
Can I still use my ceiling fan if it falls off but is still intact?
If your ceiling fan falls off but remains intact, it is crucial to prioritize your safety. Before considering using it again, it’s important to conduct thorough ceiling fan maintenance and follow proper safety precautions to ensure it is safe and secure.
Will home insurance cover the cost of repairing or replacing a fallen ceiling fan?
Yes, home insurance coverage may cover the cost of repairing or replacing a fallen ceiling fan. It can help alleviate the financial burden of ceiling fan repair costs and provide you with peace of mind.
How often should I check the stability of my ceiling fan?
To prevent ceiling fan accidents, it is crucial to regularly check the stability of your fan. Professional installation ensures proper mounting and reduces the risk of a fallen fan. Don’t underestimate the importance of these precautions.
What are the signs that indicate a ceiling fan may be at risk of falling off?
To ensure ceiling fan safety, regularly inspect for signs of instability. Look for wobbling, loose connections, or excessive vibration. Common causes of ceiling fan accidents include improper installation, poor maintenance, and faulty mounting hardware. Take immediate action if any warning signs are present.
Conclusion
In conclusion, dealing with a fallen ceiling fan can be a daunting task, but by following the necessary steps, you can ensure your safety and restore comfort to your home.
Remember to assess the damage, turn off the power, gather the required tools, and carefully remove the fallen fan.
Repairing or replacing the bracket may be necessary, followed by the installation of a new fan.
Test and adjust the new fan to ensure proper functioning.
If needed, don’t hesitate to seek professional help.
Remember, with patience and determination, you can overcome unexpected issues and restore harmony to your living space.